You don’t need a beach, mountain, expensive studio or exotic location to take a photograph people want to stop and look at.
In fact, some of the best photography ideas at home begin with objects most people walk past every day: a glass of water, a houseplant, a mirror, a cup of coffee or even a beam of sunlight on the floor.
The secret is learning to see familiar things differently.
Your home can become a miniature photography studio where you can practice light, composition, perspective, storytelling and timing without waiting for the perfect location. Current photography guides also emphasize that everyday household objects and natural window light can provide surprisingly versatile subjects.
Here are 25 projects to try.
25 photography ideas at home
1. Photograph a portrait beside a window
A large window can become your simplest studio light.
Place your subject close to the window and turn them slightly toward the light. Try front lighting, side lighting and backlighting.
For softer results, shoot when the sunlight isn’t directly hitting the subject.
Try this: Use a white wall or bedsheet on the opposite side as a simple reflector.
2. Create a dramatic window silhouette
Instead of exposing for the person, expose for the bright window.
The subject will become dark while the window becomes bright.
This works particularly well for profiles, plants, hands and creative self-portraits.
Adobe also recommends window silhouettes as an effective at-home setup when working with limited equipment.
3. Make a flat-lay photograph
Flat lays are among the easiest creative photography ideas at home.
Arrange objects on a table or floor and photograph them directly from above.
Try themes such as:
- Morning coffee
- Books and glasses
- Skincare
- Travel accessories
- Photography equipment
- Stationery
- Food
- Technology
Keep the color palette controlled so the photograph doesn’t become visually chaotic.
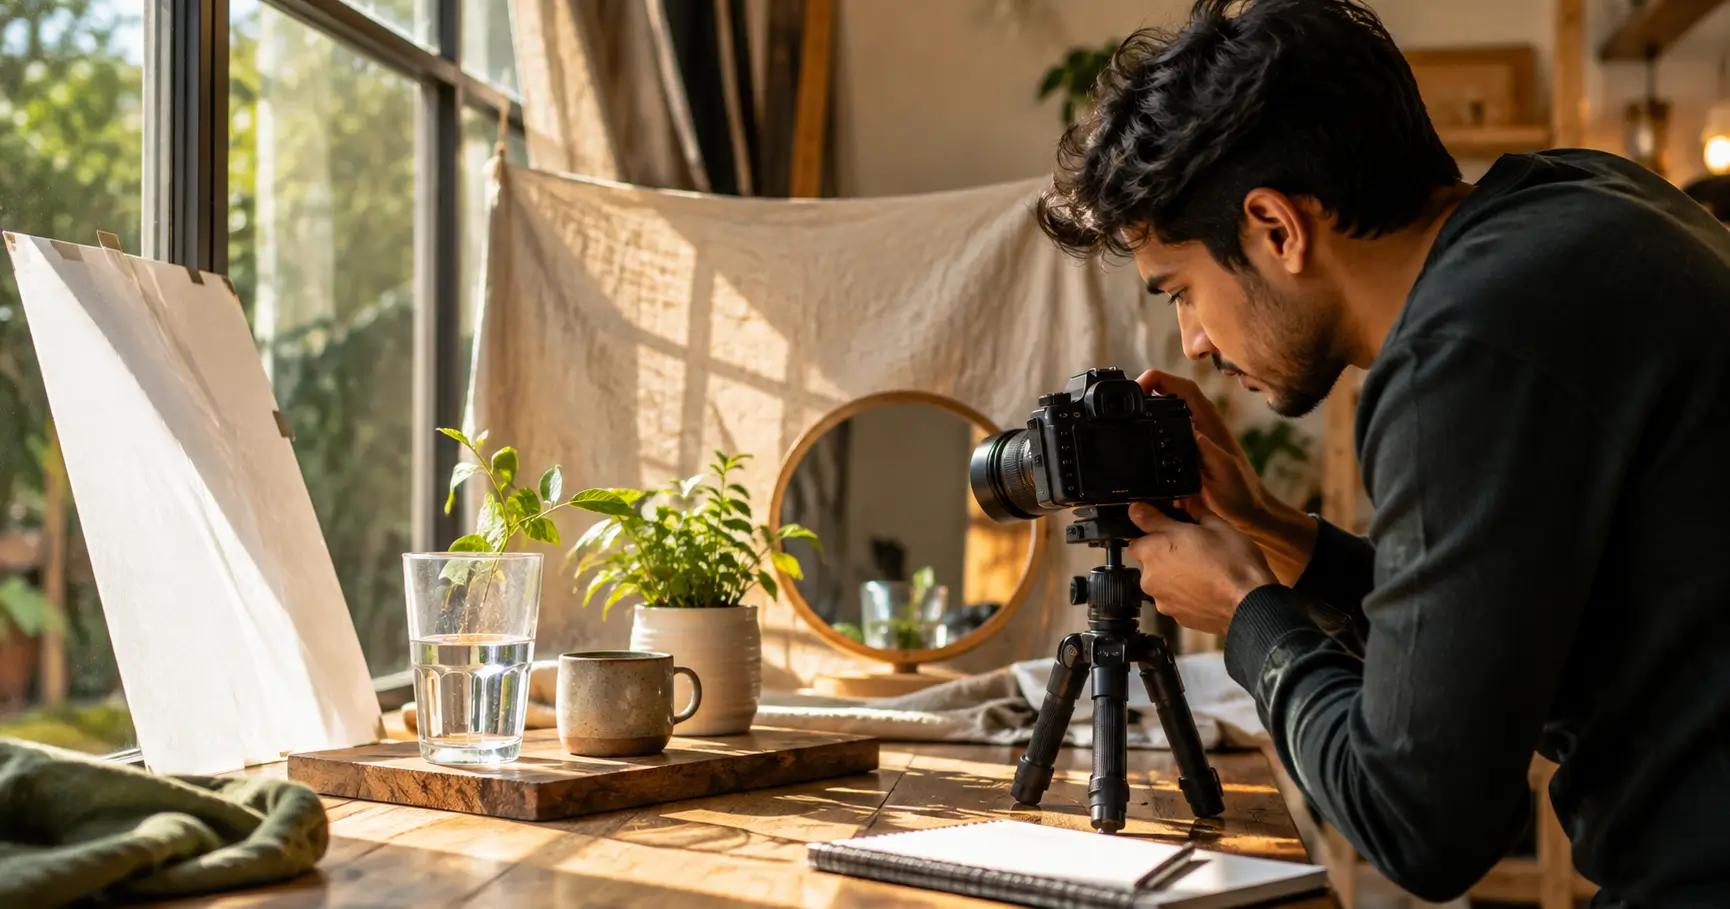
4. Photograph a glass of water
A transparent glass gives you opportunities to experiment with refraction, reflections and distortion.
Place it near a window and photograph objects through the glass.
You can also add fruit slices or colored paper behind it to change the appearance.
5. Create a water-splash photograph
This project can look complicated, but the basic concept is surprisingly simple.
Place a glass or bowl on a clean background and experiment with drops, fruit or other safe objects entering the water.
Use a fast shutter speed if your camera allows manual control.
A tripod and remote trigger can make repeated experiments much easier.
6. Turn a mirror into a creative prop
Don’t simply photograph your reflection.
Try placing a mirror at an angle and photographing the reflection from the side.
You can also use multiple mirrors to create repeated reflections.
Creative trick: Partially cover the mirror with fabric, plants or another foreground object to make the composition more mysterious.
7. Try a self-portrait without looking at the camera
Self-portraits don’t have to look like selfies.
Use a tripod, phone stand or stable surface and set a timer.
Look away from the camera, interact with an object or photograph yourself through a reflection.
This often creates a more natural editorial feeling.
8. Photograph houseplants like landscapes
Move close to a plant and treat it like a miniature forest.
Look for:
- Backlighting
- Leaf shadows
- Repeating patterns
- Water droplets
- Curved stems
- Overlapping leaves
A wide aperture can separate one leaf from the background.
9. Create a shadow photography project
Shadows can become the main subject.
Place objects near a window and photograph the patterns they create.
Try blinds, plants, glassware, chairs or textured objects.
The important part is to watch how the shadow changes during the day.
10. Photograph ordinary objects from a macro perspective
Take something boring and get extremely close.
A coin, fabric, keyboard, fruit peel, book page or wooden surface can become an abstract image when viewed close enough.
You don’t necessarily need a dedicated macro lens.
Your smartphone’s close-focus or macro mode may be enough to start experimenting.
11. Make a miniature world
Use toys, small figures or everyday objects to create a tiny scene.
For example, a miniature figure beside a cup can become a surreal landscape.
Try adding:
- Flour as snow
- Paper as a background
- Plants as trees
- Water as a lake
- Books as buildings
This is one of the best projects for learning scale and visual storytelling.
12. Photograph food like a magazine
You don’t need a professional food studio.
Place a plate near a window and remove distracting objects from the background.
Shoot from three angles:
- Directly above
- Approximately 45 degrees
- At table level
Then compare the results.
Food photography becomes much easier when you control the background and light before worrying about editing.
13. Create a coffee photography series
Turn one cup of coffee into an entire photography project.
Photograph:
- Steam
- Pouring coffee
- Coffee beans
- The cup from above
- A hand holding the cup
- Coffee beside a book
- Coffee beside a laptop
The goal isn’t one perfect image.
The goal is to create a visual story from one subject.
14. Photograph through curtains
Sheer curtains can act as a natural diffusion layer.
Place a person, plant or object beside the curtain and photograph through the fabric.
The result can create a soft, dreamy atmosphere without buying a filter.
15. Create a colored-light portrait
Use colored paper, LED lights or a screen to introduce color.
Place one color on one side of the subject and another color on the opposite side.
Keep the background simple.
This technique is particularly useful for learning how color affects mood.
16. Try a black-and-white photography challenge
Remove color from the equation.
Photograph objects with strong:
- Texture
- Contrast
- Shapes
- Shadows
- Lines
- Repetition
Black-and-white photography forces you to pay more attention to light and form.
17. Photograph reflections in everyday objects
Look beyond mirrors.
Try:
- Spoons
- Glass tables
- Windows
- Polished appliances
- Sunglasses
- Phone screens
- Metal objects
Move the camera until the reflection becomes part of the composition rather than an accidental distraction.
18. Create a product photograph
Choose an everyday product.
It could be a watch, bottle, headphones, notebook or cosmetic item.
Build a simple scene using:
- Clean background
- Window light
- Reflector
- One or two props
This is also useful practice if you want to learn commercial photography.
Current home-product photography guidance shows that controlled backgrounds, natural light and inexpensive setups can produce polished results without a conventional studio.
19. Photograph your pet like a professional portrait
Pets can be difficult subjects because they rarely follow directions.
Instead of forcing a pose, watch for natural moments.
Put your pet near a window and photograph them when they’re relaxed.
Use burst mode for movement.
Digital Camera World similarly recommends thoughtful positioning and lighting for creating stronger pet portraits indoors.
20. Make a long-exposure light painting
This is where your living room can become a completely different world.
Put your camera on a tripod, use a long shutter speed and move a small light source through the frame.
Experiment with:
- Flashlights
- Phone lights
- Small LEDs
The camera records the path of the moving light.
Safety note: Keep the area clear and use only safe, low-temperature light sources.
21. Photograph rain through a window
You don’t even need to photograph the rain outside directly.
Focus on water droplets on the glass while allowing the background to become soft and blurry.
City lights, plants and street scenes can create beautiful bokeh behind the droplets.
22. Create a “one object, ten photos” challenge
Choose one object.
Now give yourself ten minutes to photograph it ten different ways.
Change:
- Distance
- Angle
- Light
- Background
- Orientation
- Focus
- Reflection
- Perspective
This is one of the simplest ways to improve your photographic eye.
23. Build a DIY studio backdrop
You don’t need expensive paper backdrops.
Try:
- Plain bedsheets
- Large pieces of paper
- Cardboard
- Fabric
- A clean wall
- Wooden surfaces
Keep the background wrinkle-free and make sure it doesn’t compete with your subject.
24. Photograph everyday life
Not every photograph needs to be “creative.”
Sometimes the strongest project is documenting your actual environment.
Photograph:
- Morning routines
- Family moments
- Cooking
- Reading
- Working
- Pets
- Evening light
- Objects that have personal meaning
These photographs can become valuable visual records because they capture your life rather than a manufactured scene.
25. Photograph the same object throughout the day
This is the project I’d recommend if you want to understand light.
Choose one object and photograph it:
- Early morning
- Midday
- Afternoon
- Golden hour
- After sunset
Don’t change the object.
Only the light changes.
You’ll quickly see how dramatically lighting direction, color and contrast affect the final image.
The most important ingredient is light
The biggest mistake beginners make is looking for interesting objects before looking at the light.
Reverse that process.
Walk around your home and identify:
- Where the brightest window is
- Where shadows fall
- Which walls reflect light
- Which surfaces reflect objects
- Which rooms have the cleanest backgrounds
A home photography guide from Retouching Labs similarly recommends using window light, clean backgrounds and household props as the foundation for indoor photography.
Why window light works so well
A large window effectively becomes a broad light source.
When the light is soft, it can produce smoother transitions between highlights and shadows.
This makes it particularly useful for portraits, food and still-life photography.
Don’t mix every light source
If possible, avoid mixing daylight with multiple indoor bulbs when you’re learning.
Different light sources can have different color temperatures.
That can make skin tones and neutral objects look inconsistent.
Start with one dominant light source.
Then add artificial lighting deliberately once you understand what it is doing.
How to take professional-looking photos at home
Professional-looking images don’t necessarily require professional equipment.
They usually require better decisions.
Use this simple process.
Step 1: Clean the scene
Remove everything that doesn’t contribute to the photograph.
Step 2: Find the light
Move the subject rather than immediately moving the camera.
Step 3: Choose one visual idea
Don’t combine ten concepts in one photograph.
Decide whether you’re emphasizing color, texture, reflection, shape, emotion or movement.
Step 4: Change your perspective
Take the photograph from:
- Eye level
- Floor level
- Above
- Close-up
- Through an object
Step 5: Simplify
If something isn’t helping the photograph, remove it.
Step 6: Take variations
Shoot several versions before changing the setup.
Step 7: Edit lightly
Correct exposure, white balance, contrast and cropping before adding dramatic effects.
Best photography ideas at home with a phone
A smartphone is enough for many of these projects.
Modern phone cameras can handle portraits, close-ups, food, reflections, still life and everyday documentation extremely well.
For better results:
- Clean the lens.
- Use the main camera when possible.
- Avoid excessive digital zoom.
- Tap to focus on your subject.
- Control exposure when your camera app allows it.
- Use grid lines to check composition.
- Keep the phone stable in low light.
- Try different camera heights.
The camera is only one part of the process.
The light and composition often have a larger effect on the final image.
A simple home photography setup
You can start with almost nothing.
| Item | Purpose |
|---|---|
| Smartphone or camera | Capture the image |
| Window | Natural light |
| White paper/cardboard | DIY reflector |
| Bedsheet/fabric | Background |
| Mirror | Reflection effects |
| Glass | Refraction |
| Tripod or stable surface | Camera stability |
| Household objects | Props |
| Small LED light | Creative lighting |
This approach is consistent with current at-home photography guidance, which frequently uses windows, household objects, mirrors, fabric and inexpensive DIY materials instead of dedicated studio equipment.
Common mistakes in home photography
Too much clutter
A photograph can contain interesting objects and still look messy.
Fix: Remove everything that doesn’t support the subject.
Using only overhead room lighting
Ceiling lights often create unattractive shadows.
Fix: Try window light first.
Shooting everything from eye level
This makes photographs feel repetitive.
Fix: Change camera height and distance.
Over-editing
Heavy HDR, excessive clarity and extreme saturation can quickly make images look artificial.
Fix: Make small adjustments and compare them with the original.
Ignoring the background
A great subject cannot always rescue a distracting background.
Fix: Check the entire frame before pressing the shutter.
Buying equipment too early
More equipment doesn’t automatically solve a composition problem.
Fix: Complete several photography challenges with the gear you already own.
Photography myths vs facts
| Myth | Fact |
|---|---|
| You need a DSLR | A smartphone can handle many home projects |
| You need a studio | A window and clean background can be enough |
| Expensive lenses create creativity | Creativity comes from ideas and execution |
| Every image needs heavy editing | Strong lighting and composition should come first |
| Small homes aren’t suitable | Limited space can encourage better composition |
| You need professional models | Everyday people, pets and objects make excellent subjects |
A seven-day home photography challenge
Want to turn these ideas into actual practice?
Try this one-week challenge.
Day 1 — Light
Photograph the same object beside a window at three different times.
Day 2 — Reflection
Create five photographs using mirrors, glass or reflective surfaces.
Day 3 — Portrait
Make three portraits using only window light.
Day 4 — Still life
Arrange five household objects into a deliberate composition.
Day 5 — Macro
Photograph ten close-up textures.
Day 6 — Motion
Experiment with movement and shutter speed.
Day 7 — Story
Create a five-photo visual story about an ordinary day at home.
At the end, compare your first and final images.
The improvement may have less to do with your equipment than with how you now see light and composition.
The real secret behind better home photography
The most valuable thing you can photograph at home isn’t an expensive object.
It’s light falling on an ordinary object.
A glass can become abstract.
A plant can become a landscape.
A bedroom can become a portrait studio.
A kitchen counter can become a commercial product set.
A hallway can become a cinematic scene.
That shift in perspective is what makes home photography so useful.
You aren’t simply collecting photographs.
You’re training yourself to recognize composition, light, texture, color, perspective and story wherever you go.
Key takeaways
- You don’t need a professional studio to make compelling photographs.
- Window light is one of the most useful resources in a home.
- Everyday objects can become strong photographic subjects.
- Reflections, shadows and textures create visual interest without expensive equipment.
- Smartphones are capable of many excellent indoor photography projects.
- Changing your perspective can transform a familiar scene.
- Simple compositions often outperform cluttered setups.
- Practice is more valuable than constantly buying new equipment.
Start with one object today.
Photograph it ten different ways.
Then choose the strongest image and ask yourself one question:
What made this version better than the other nine?
That answer will teach you more about photography than another hour of scrolling through inspirational images.
FAQ
What are some easy photography ideas at home?
Try window-light portraits, flat lays, plant photography, reflections, food photography, self-portraits, shadows, close-up textures and still-life photography. Most require little or no specialized equipment.
Can I do photography at home with a phone?
Yes. A smartphone can handle many indoor photography projects, including portraits, still life, food, reflections, macro-style close-ups and product photography.
How can I make my home photos look professional?
Focus on good light, a clean background, intentional composition and stable camera positioning. Professional-looking results usually come from controlling the scene rather than simply using expensive equipment.
What is the best lighting for photography at home?
Large windows are an excellent starting point because they provide broad natural light. Diffused daylight is particularly useful for portraits, food and still-life photography.
What can I photograph at home?
You can photograph people, pets, plants, food, books, household objects, products, reflections, shadows, textures, water, glass and miniature scenes.
How can I practice photography at home?
Choose one subject and photograph it from different distances, angles and lighting conditions. A simple “one object, ten photos” challenge is an effective way to practice composition and creative problem-solving.
Conclusion
Great photography doesn’t begin when you find an extraordinary location.
It begins when you learn to see ordinary things differently.
A window can become studio lighting. A bedsheet can become a backdrop. A mirror can create an optical illusion. A houseplant can become a miniature landscape. Even a simple glass of water can become an abstract photograph.
That’s why photography ideas at home are more than a way to stay creative indoors—they are a practical training ground for understanding light, composition, perspective and storytelling.
You don’t need to buy another camera before you start.
Pick one object, choose one light source and create ten completely different photographs today. Then repeat the exercise tomorrow with something else.
The more deliberately you practice, the more photographic opportunities you’ll begin noticing everywhere—even when you finally step outside.
Disclaimer
Photography Disclaimer: The techniques and camera settings described in this article are general educational guidance. Results can vary depending on your camera, smartphone, lens, lighting conditions, room size and subject. When experimenting with water, electricity, glass, heat, tripods or other household materials, use appropriate caution and keep photography equipment away from situations that could cause damage or injury.